🔧 First setup
First boot asks for nothing while DHCP gives the box an address. The console walks through the same steps whether you watch it in the hypervisor's console window (VMware or Proxmox VE) or on a serial line.
🌐 Network
As soon as the box has an address (DHCP or SLAAC on its first linked network card), this step is done. If nothing comes within 30 seconds, the console shows the available network ports and offers N to type an address, prefix, gateway and DNS server by hand, or R to try DHCP again.
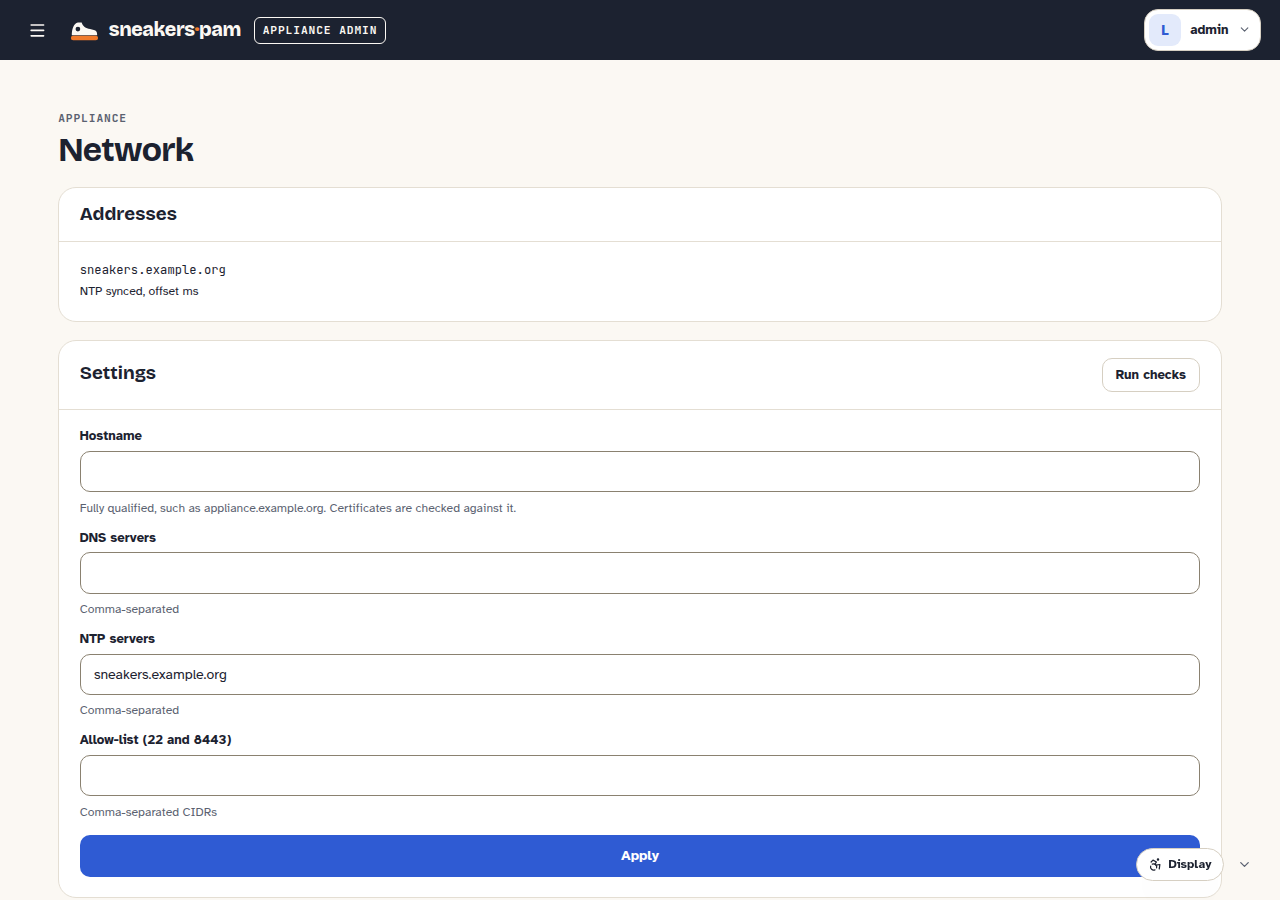
A box that took a DHCP lease can still move to a static address later: on :8443's Network
page, over SSH with network set and network commit, or with N on the console once setup is
done. See Changing the appliance's network.
🔑 Protection
Chosen automatically from the hardware (a TPM or vTPM, and whether Secure Boot is enforced) — see Protection levels for what "full" and "reduced" mean and how to raise it later.
📺 Ready to set up
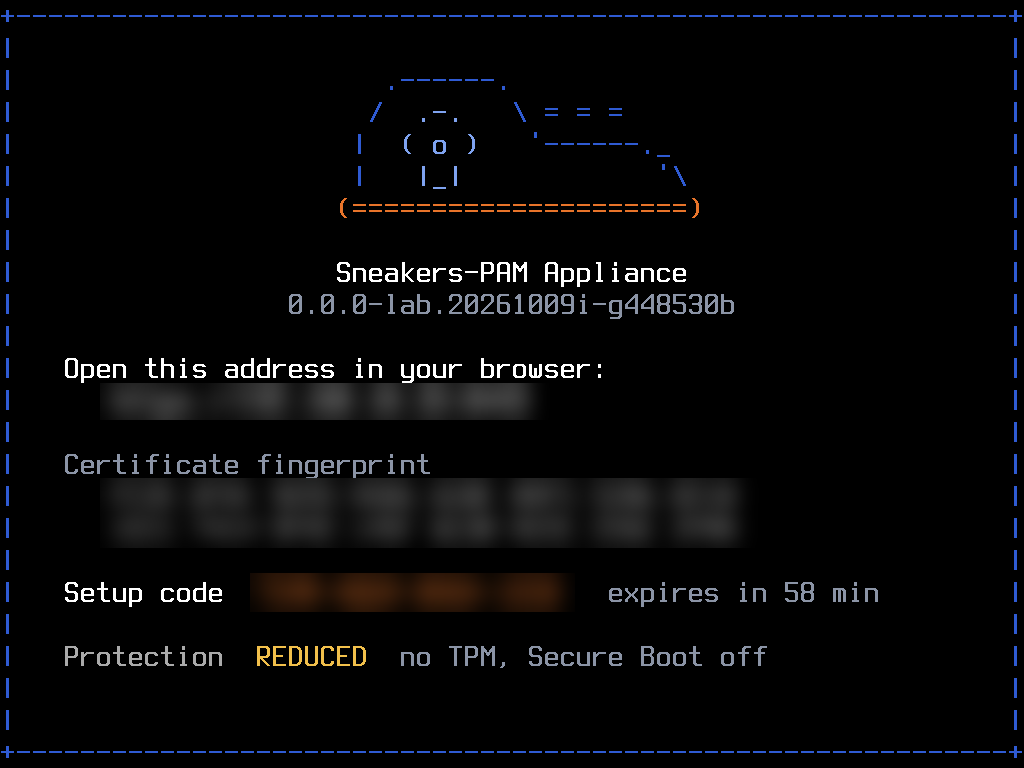
Once the network and protection steps are done, the console shows:
- the
https://<address>:8443address to open, on every management address; - the certificate's SHA-256 fingerprint, grouped in fours so it can be read aloud and checked against what the browser shows on the first visit;
- a one-time setup code (16 Crockford base32 characters,
XXXX-XXXX-XXXX-XXXX), good for 60 minutes; a new one replaces it if it lapses.
   Open this address in your browser:
      https://192.0.2.10:8443

   Certificate fingerprint
      7C2E 91AB 4F06 D3E8 B15A 6C90 2E7F 0A4D
      E38B 5C21 9FD0 76A4 C1E9 0B3F 8D62 A7C5

   Setup code  7PQK-NMS9-XD2A-4KJW   expires in 59 min

   Protection  REDUCED  no TPM, no Secure Boot
Open the address, check the fingerprint matches, and type the setup code.
👤 Create the first appliance admin
The :8443 setup page has six steps, in order:
-
Setup code. Type the code from the console.
-
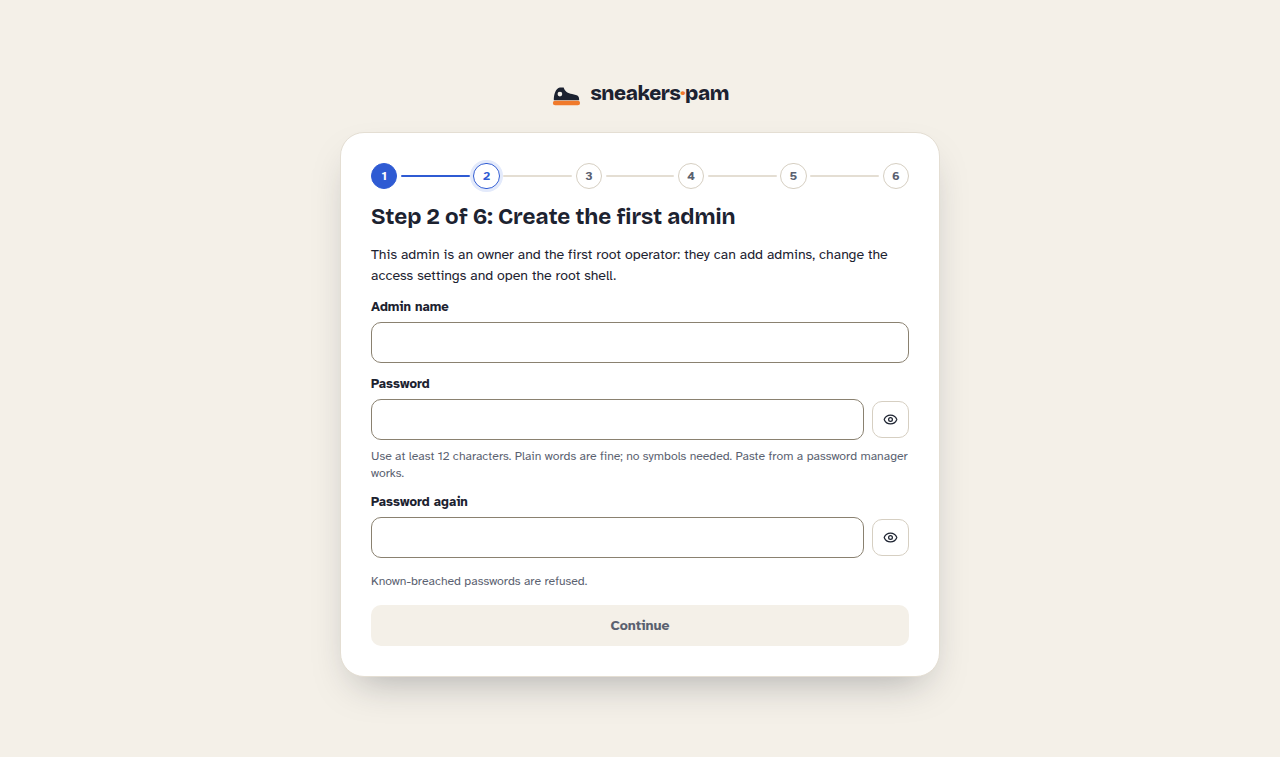
First admin. Create the first appliance admin.
-
Type a name and a password (12 characters or more, no composition rules, nothing on the breached-password list).
-
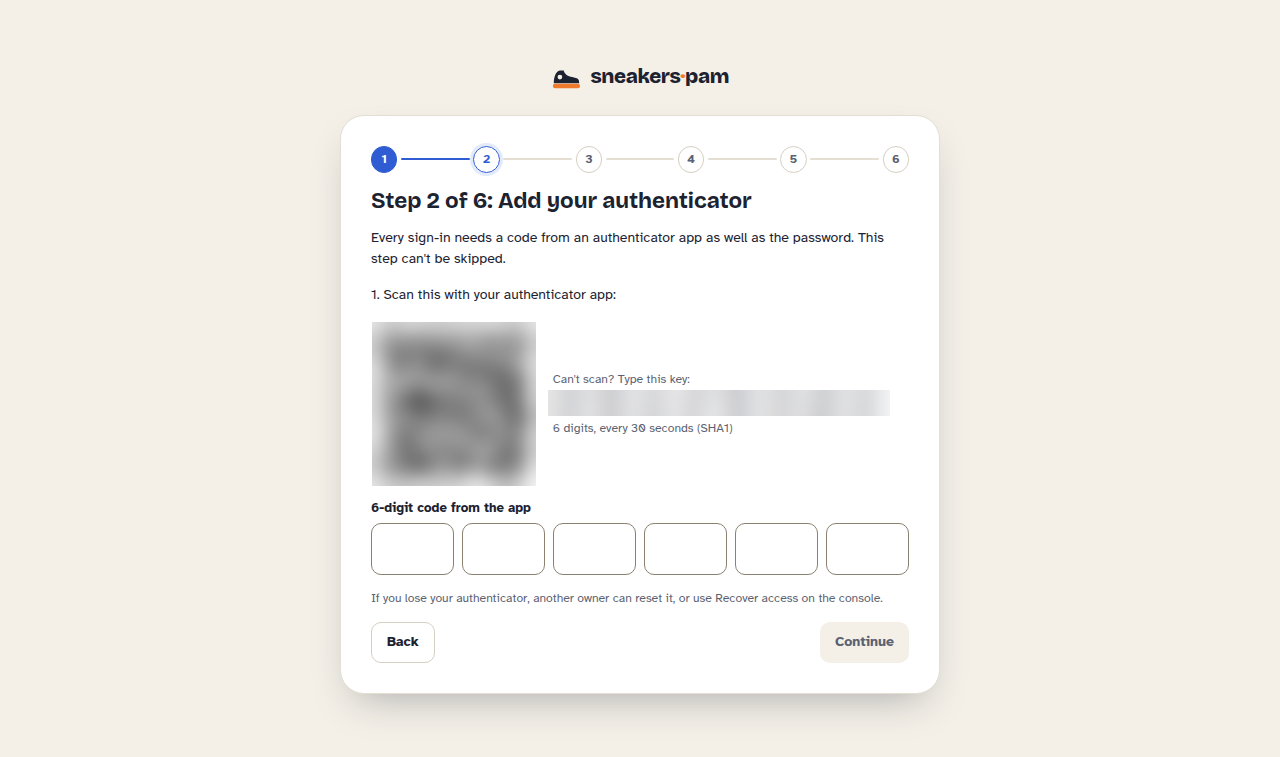
Scan the QR code (or type the key by hand) into your authenticator app.
-
Confirm with a 6-digit code from the app. There's no skipping the second factor.
This admin is an owner and the first root operator.
-
-
Recovery keys. Add one to three recovery keys: let the box make one and download it, or paste an SSH public key of your own. A recovery key is the only way to open the escrow and the box's backup exports if this box's TPM or key file is ever lost. Keep it offline; it isn't a login key. With no admin able to sign in, the way back in is Recover access on the console (see Console and shells).
-
Network (optional): check the address the box took. You can change the address, host name and DNS here or later on the Network page.
-
Protection. Read the protection level the box booted with and acknowledge it.
-
Sign in with the admin you made. With only one admin, confirm the single-admin warning, then finish.
Once the first admin exists, SSH (port 22) opens for admin logins. Once setup finishes, the box
moves from firstboot to normal operation, restarting once by itself if it needs to.
The escrow is a file encrypted to your recovery keys. Once the product is installed it also holds the product's keys (the vault's root key and the TOTP key), and a restore onto a new box can't open the product's data without them. Download it from the Backups page after you install the product, again after an import, and again after anything that changes the keys.
📦 Install the product
With the appliance itself set up, install Sneakers-PAM. You need the owner role and your authenticator app.
-
On
:8443, open Updates. -
On the Product card, pick the version and select Fetch. On an air-gapped box, upload the product file under Install an update instead.
-
Select Verify and stage. The box checks the file's signature, channel and checksum before it unpacks anything.
-
Select Apply update on the card.
-
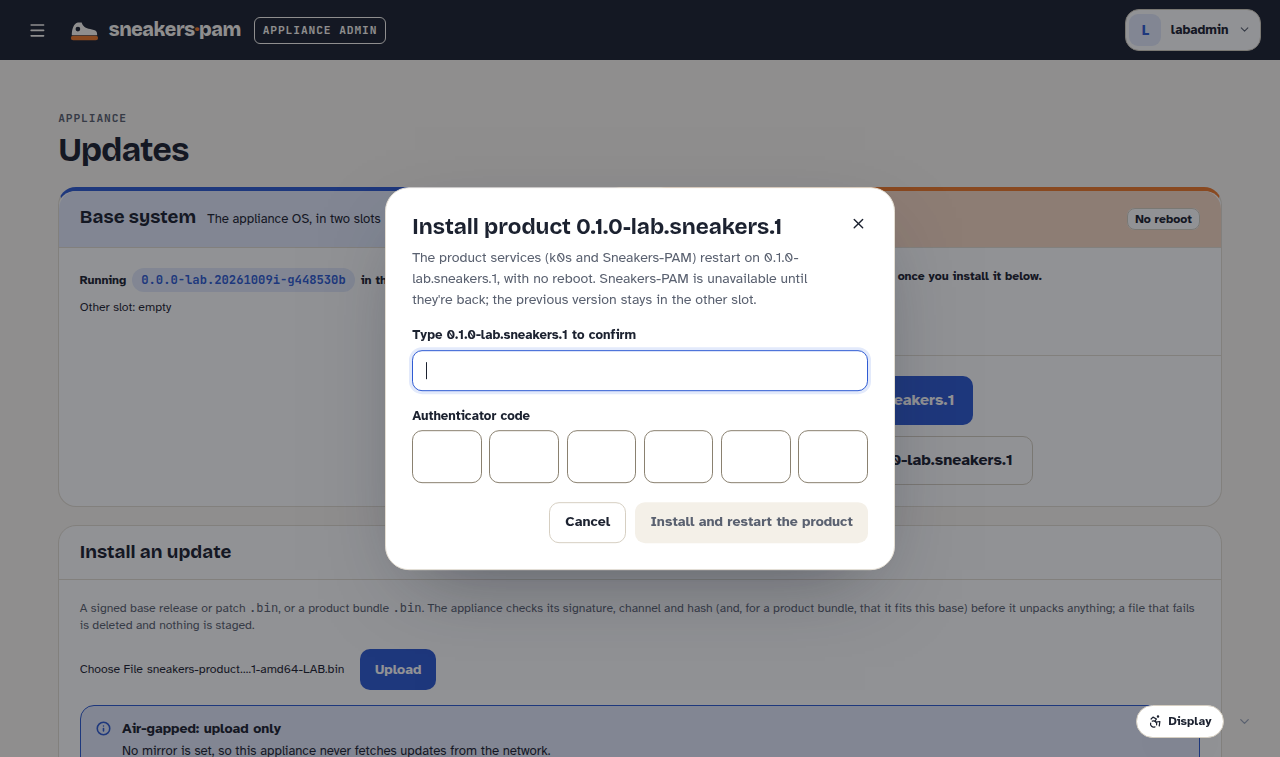
In the dialog, type the version and enter a fresh authenticator code.
-
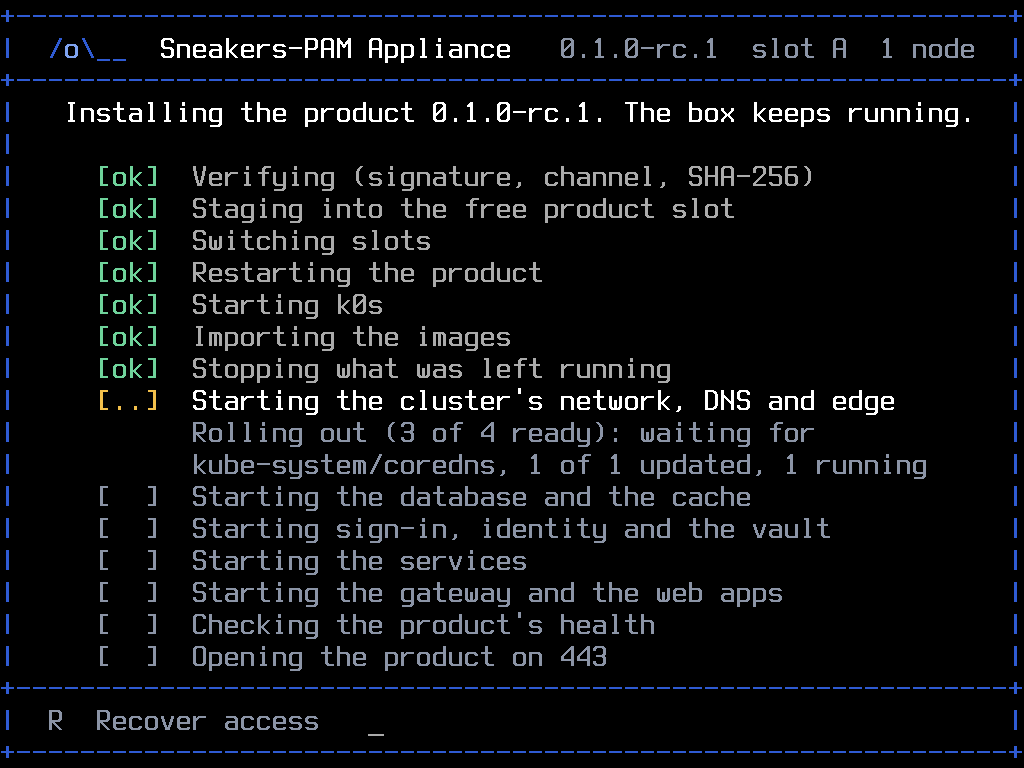
Wait while the box starts k0s and brings the product up phase by phase (cluster, data, identity, services, front). The maintenance screen on the console, and the Updates page, both show which phase is running.
-
Check the console's status screen. Once the product reports healthy, port 443 opens with it, and the screen shows the base and product both healthy.

Updating the appliance has more on the Updates page.
🚪 Set up Sneakers-PAM itself
The product's own first-run setup is separate from the appliance's, and it needs a one-time setup token.
-
Get the token. On the
:8443Status page, find Sneakers setup token and choose Show, or read it over SSH:ssh admin@box1.sneakers.example.org sneakers setup-tokenOver SSH it prints the token with the link to use it:
Sneakers setup token:stp_...Use it at https://box1.sneakers.example.org/admin/setupIt works once; after that it's removed. -
Open the link,
https://<host name>/admin/setup. -
Enter the setup token, then the first Sneakers-PAM admin's username, display name, email and password.
-
Enter the code it emails you to verify your address.
The token works once. After that, the Status page only says it was used. Hand people the user guide and start building out folders and permissions.
Don't run the product's own setup at all. Open Import on :8443 before anyone visits /admin/setup
— see the migration guide.